1 概述
本文档将展示如何使用 Cloud Translation 高级版(v3)翻译示例文本。
官网地址如下:
2 Google后台设置Cloud Translation
在使用cloud translation前需要在谷歌后台进行设置。
2.1创建或选择项
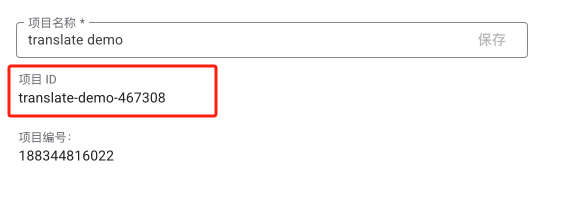
如需使用 Google Cloud提供的服务,您必须创建一个项目。项目可以组织您的所有 Google Cloud 资源。 项目由一组协作者、已启用的 API(和其他资源)、监控工具、结算信息以及身份验证和访问权限控制组成。您可以创建一个项目,也可以创建多个项目,然后将其用于按资源层次结构组织 Google Cloud 资源。创建项目时,请记下项目 ID。您需要此 ID 才能进行 API 调用。 如需详细了解项目,请参阅 Resource Manager 文档。
我们建议您分别创建用于实验、测试和生产的项目。创建项目后,请记录项目编号或 ID。调用 Cloud Translation API 时,您必须提供 项目编号或 ID。
In the Google Cloud console, on the project selector page, select or create a Google Cloud project.
2.2启用结算功能
您必须启用结算功能才能使用 Cloud Translation。如需详细了解 Cloud Translation 价格,请参 价格页面。
注意:如需管理预算,可以对项目设置用量限额。如需了解详情,请参阅 设置用量配额。
结算账号用于定义一组给定资源的付款方,并且可以关联到一个或多个项目。 项目的使用费将计入关联的结算账号名下。 在大多数情况下,您在创建项目时配置结算。 如需了解详情,请参 结算文档。
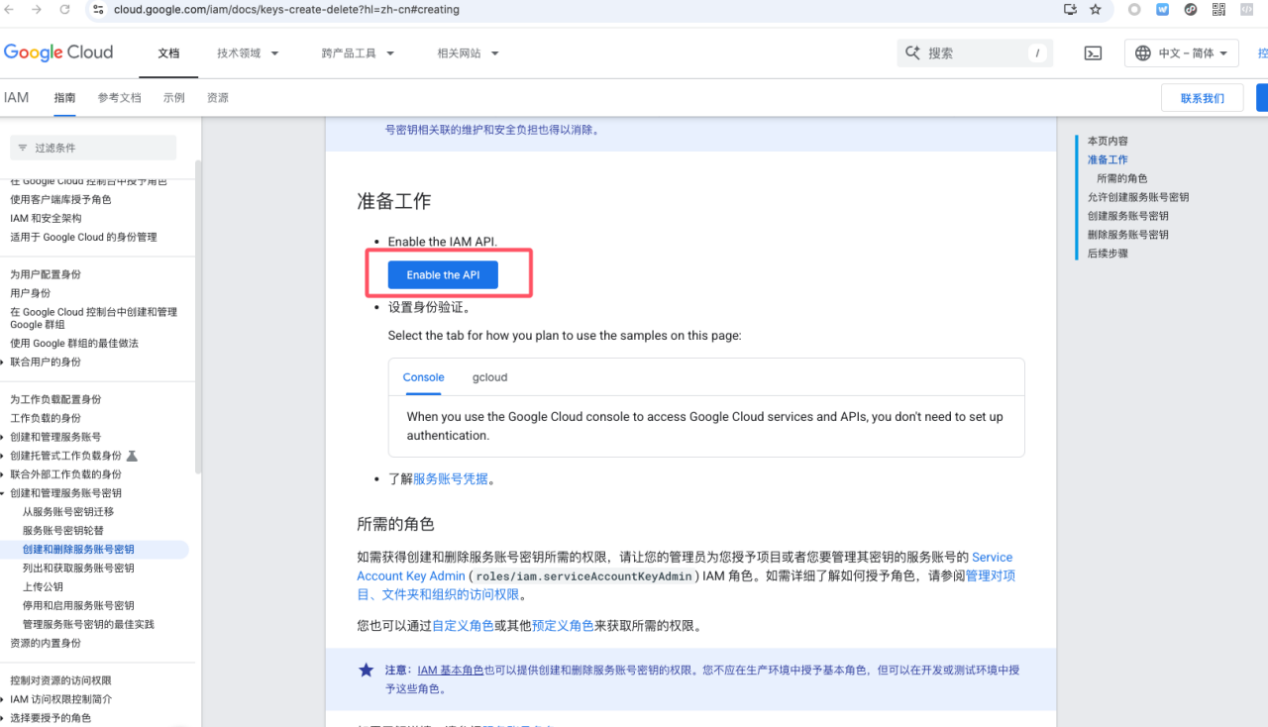
2.3启用 API
您必须为项目启用 Cloud Translation API。如需详细了解如何启用 API,请参阅 Service Usage 文档。
2.4设置用量配额
Cloud Translation 提供了配额管理系统,可帮助您和 Google 管理服务的使用。默认情况下,您每天可以发送的字符数没有限制。如果您设置了预算,则建议您监控每日使用量,并根据您计划的支出调整配额。
如需详细了解配额,请参阅配额和限制。
2.5设置身份验证
如果您计划使用 Cloud Translation API,则需要设置身份验证。任何使用 API 的客户端应用都必须经过身份验证,并且拥有所请求资源的访问权限。如需了解详情,请参阅 对 Cloud Translation 进行身份验证。
Identity and Access Management 角色
当主账号(用户账号、服务账号等)调用 API 时,Google Cloud 要求主账号具有适当的权限。您可以通过向主账号授予角色来授予权限。如需了解详情,请参阅使用 IAM 控制访问权限。
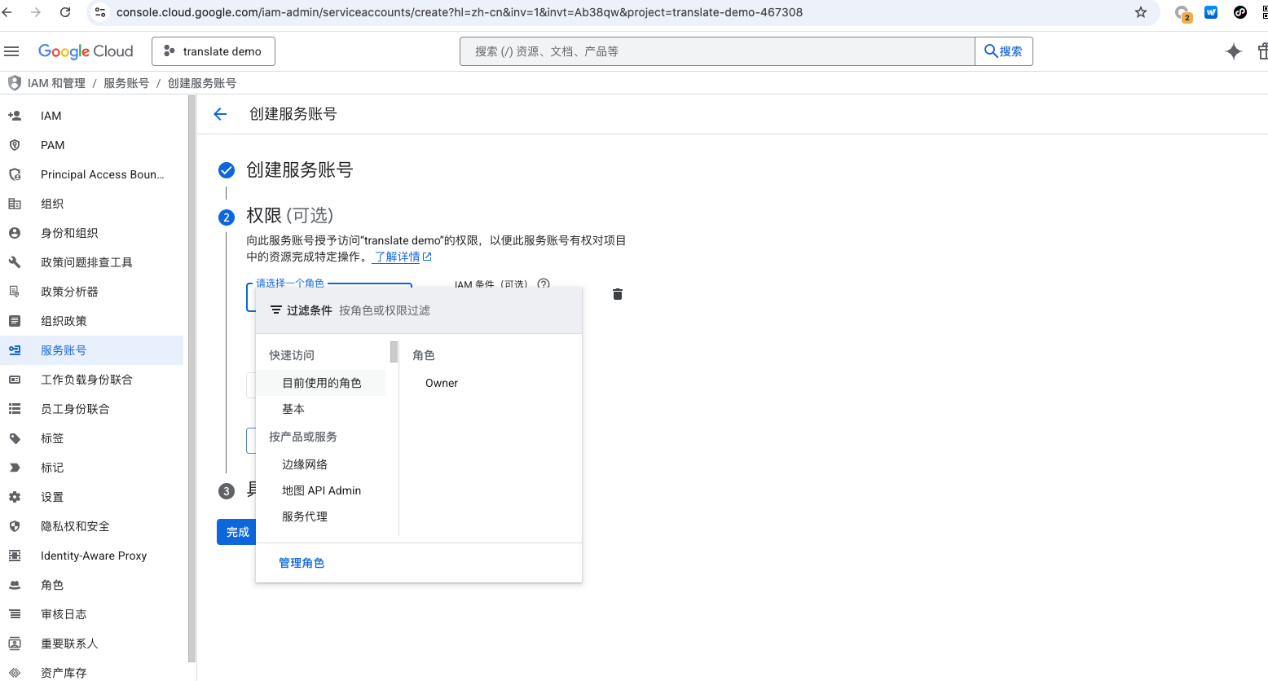
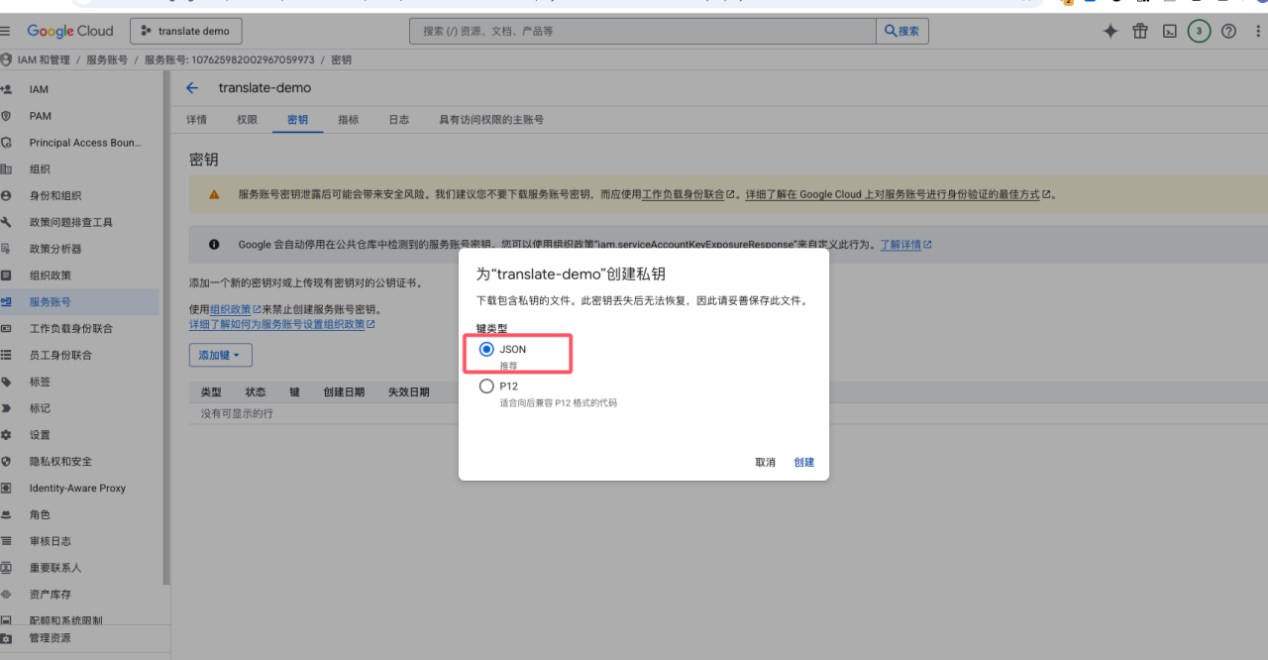
2.6创建服务账号密钥(JSON)
创建服务账号密钥
1)开启API
2)创建服务者账号,创建JSON私钥
2.7更多内容可查看
3 提供应用所需的参数
3.1密钥
json密钥文件
3.2项目id
4 Cloud Translation 高级版 (v3)功能接入
4.1接入步骤
1)第一步,获取密钥(JSON)和项目id。
2)第二步,服务端进行接入,参考代码见附件1 和附件2。
3)第三步,如果是客户端使用,请调用各个项目自研的服务端代理接口。
5 附件1:java 代码demo
5.1设置本地凭证
在本地保存Json密钥文件并设置环境变量,以windows为例,在powershell中执行:
|
1 2 |
$env:GOOGLE_APPLICATION_CREDENTIALS="C:\Users\july\Desktop\tmp\translate-demo-467308-4e442c539dd2.json" |
其他设置本地凭证方法可查看:
https://cloud.google.com/docs/authentication/set-up-adc-on-premises?hl=zh-cn#wlif-key
5.2引入依赖库
|
1 2 3 4 5 6 7 8 9 10 11 12 13 14 15 16 17 18 19 20 |
<dependencyManagement> <dependencies> <dependency> <groupId>com.google.cloud</groupId> <artifactId>libraries-bom</artifactId> <version>26.61.0</version> <type>pom</type> <scope>import</scope> </dependency> </dependencies> </dependencyManagement> <dependencies> <dependency> <groupId>com.google.cloud</groupId> <artifactId>google-cloud-translate</artifactId> </dependency> </dependencies> |
5.3demo代码
|
1 2 3 4 5 6 7 8 9 10 11 12 13 14 15 16 17 18 19 20 21 22 23 24 25 26 27 28 29 30 31 32 33 34 35 36 37 38 39 40 41 42 43 44 45 46 47 48 49 50 51 |
import org.junit.jupiter.api.Test; import com.google.cloud.translate.v3.LocationName; import com.google.cloud.translate.v3.TranslateTextRequest; import com.google.cloud.translate.v3.TranslateTextResponse; import com.google.cloud.translate.v3.Translation; import com.google.cloud.translate.v3.TranslationServiceClient; import java.io.IOException; public class testTranslate { @Test public void test1() throws IOException { // TODO(开发者): 在运行示例前替换这些变量 String projectId = "translate-demo-467308"; // 支持的语言列表: https://cloud.google.com/translate/docs/languages String targetLanguage = "zh"; String text = "hello,everybody!"; translateText(projectId, targetLanguage, text); } // 将文本翻译为目标语言 public static void translateText(String projectId, String targetLanguage, String text) throws IOException { // 初始化用于发送请求的客户端。该客户端只需创建一次, // 可在多个请求中重复使用。完成所有请求后, // 调用客户端的"close"方法安全清理剩余后台资源 try (TranslationServiceClient client = TranslationServiceClient.create()) { // 支持的位置: `global`(全局)、[术语表位置]或[模型位置] // 术语表必须托管在`us-central1`区域 // 自定义模型必须使用与模型相同的位置 (us-central1) LocationName parent = LocationName.of(projectId, "global"); // 支持的MIME类型: https://cloud.google.com/translate/docs/supported-formats TranslateTextRequest request = TranslateTextRequest.newBuilder() .setParent(parent.toString()) .setMimeType("text/plain") // 设置纯文本格式 .setTargetLanguageCode(targetLanguage) .addContents(text) // 添加待翻译文本 .build(); TranslateTextResponse response = client.translateText(request); // 显示每个输入文本的翻译结果 for (Translation translation : response.getTranslationsList()) { System.out.printf("翻译结果: %s\n", translation.getTranslatedText()); } } } } |
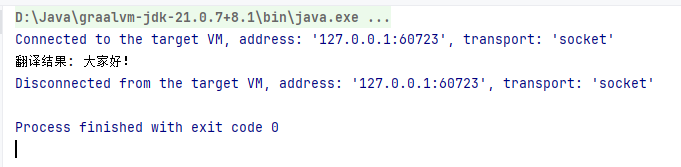
代码输出结果:
6 附件2:更多语言demo
更多语言demo可查看